How to install the Bad Gecko Under Hood Accessory Mounting Plate
The Bad Gecko Off Road Under Hood Accessory plate is designed to let you mount whatever type of accessory you have under your hood. You will need to drill your own holes in the pate for your intended use, but you are only limited to the size of the plate, and the distance between the plate and the hood.
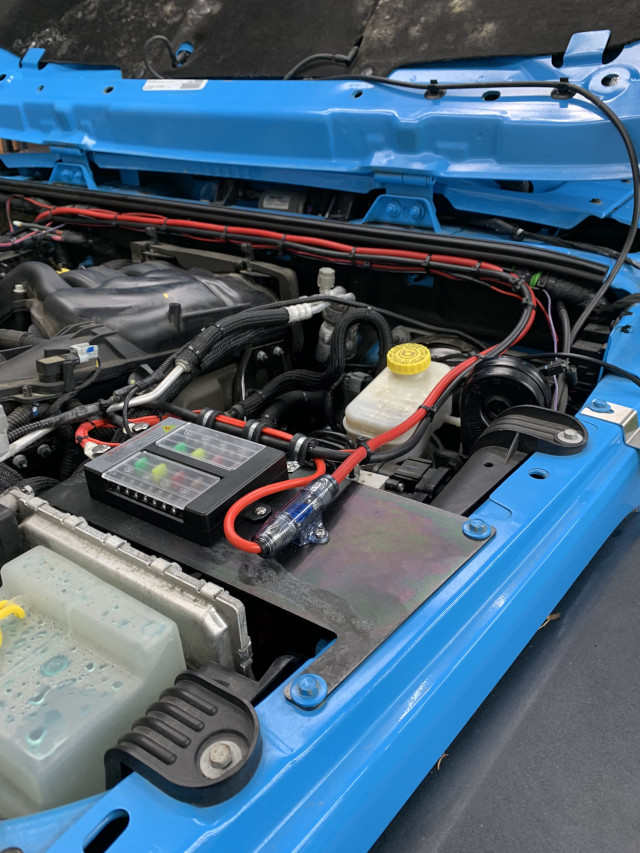
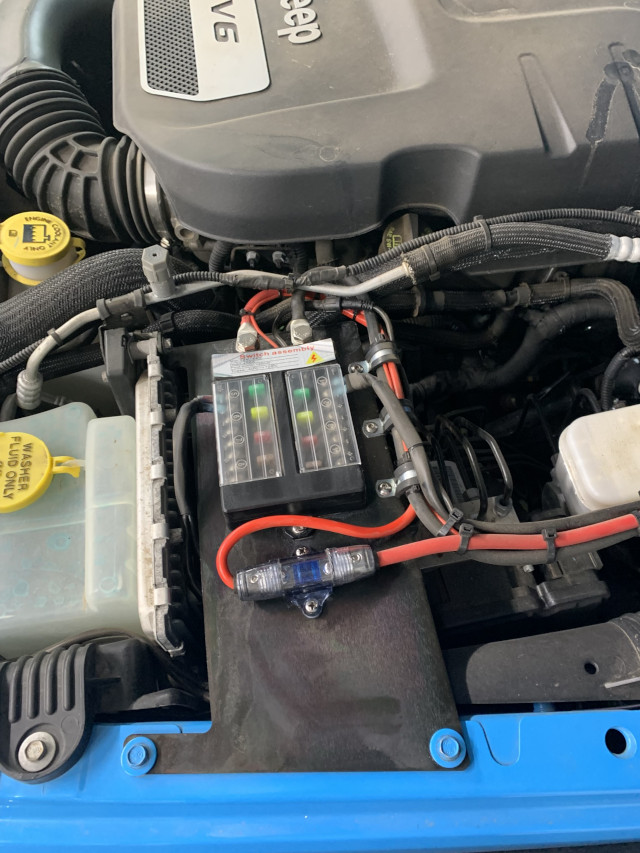
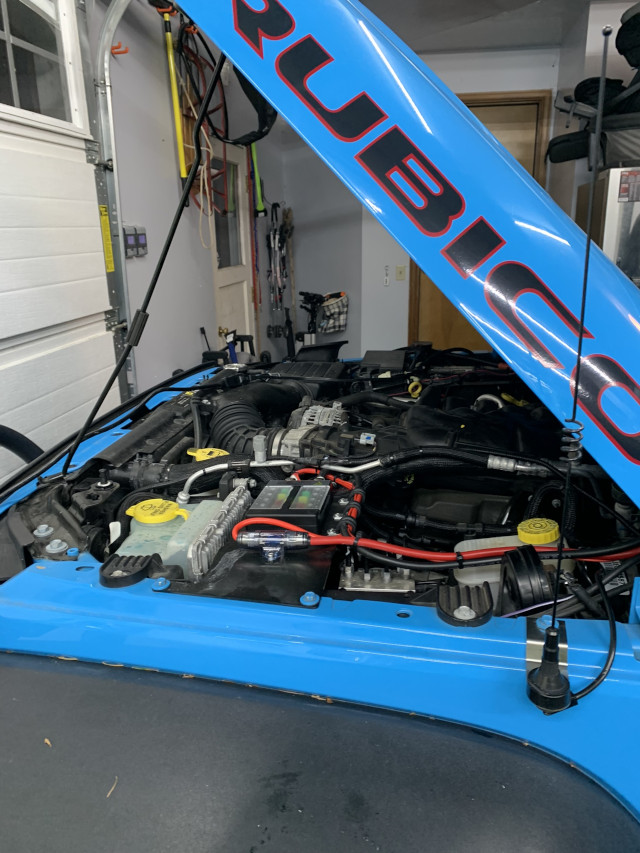
In the pictures here we used it to mount a remote switch panel to support the added lights we have on this Jeep.
It is made from .104″ (2.6mm) Mild Steel and is black zinc coated to protect against corrosion.
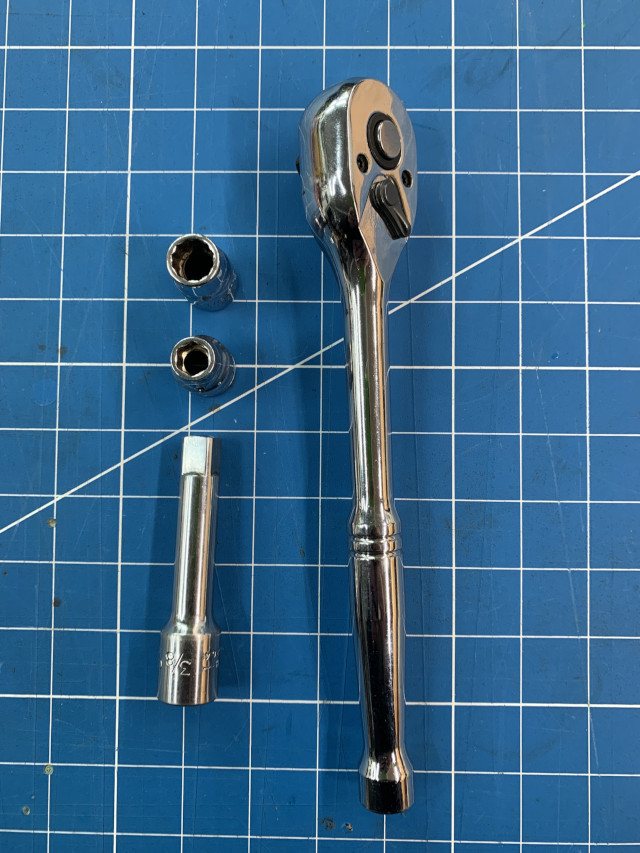
Ruquired Tools
- Ratchet
- 10mm Socket
- 8mm Socket
I do apologize if you need to make a trip to the store to buy a new 10mm socket.
Prepping for install
Using a 10mm socket remove the two bolts on top of the fender which will be used to attach one end of the plate.
These will be the two bolts just behind the bracket that holds the washer fluid tank.
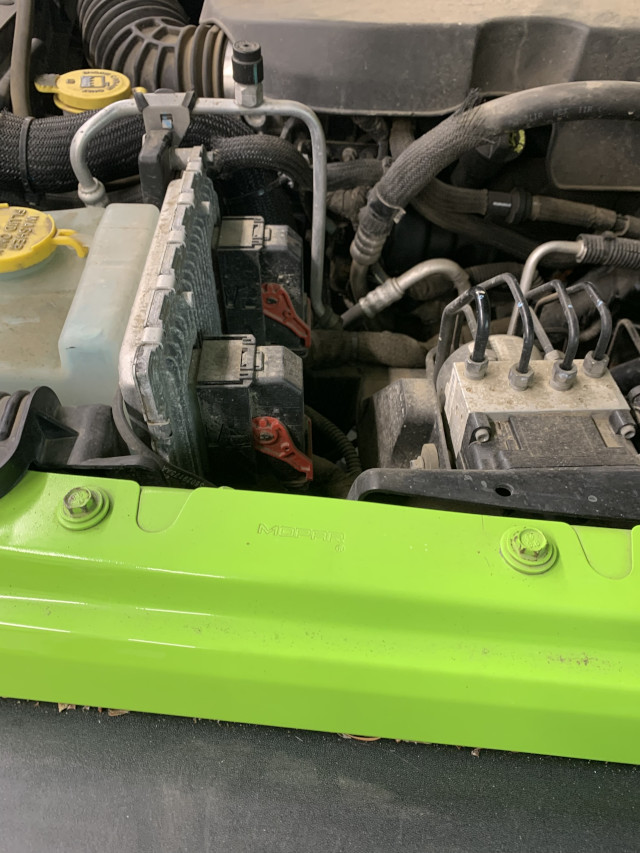
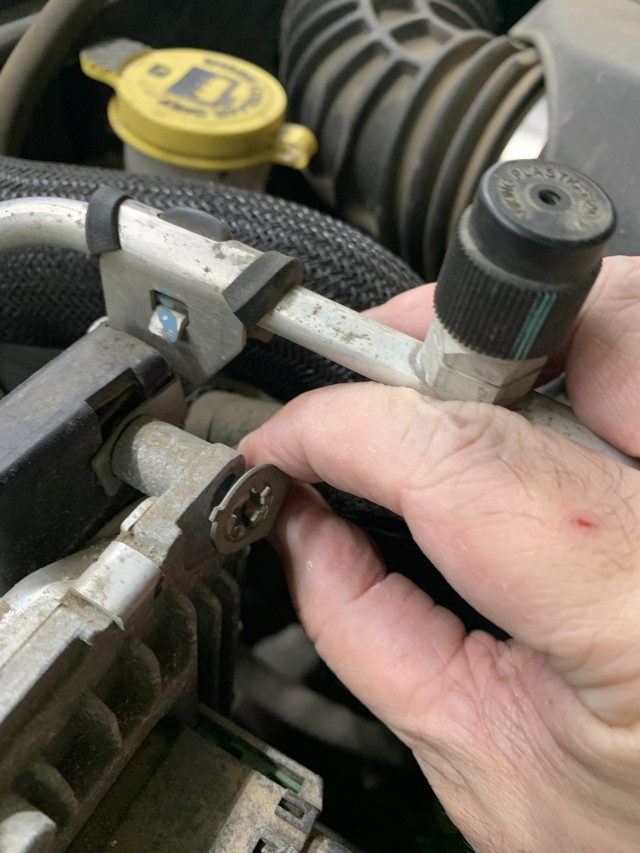
Remove the top bolt holding the Computer
Using an 8mm socket, remove the bolt at the top of the computer.
Note: This bolt is used to attach a ground wire. This wire must be reattached when we put the bolt back in. Failing to do so may cause your Jeep throw check engine codes.

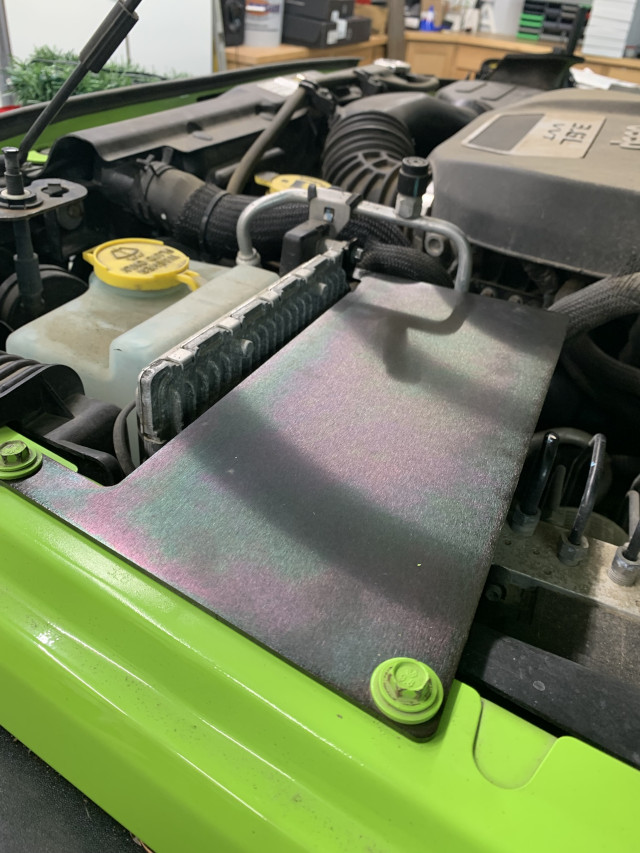
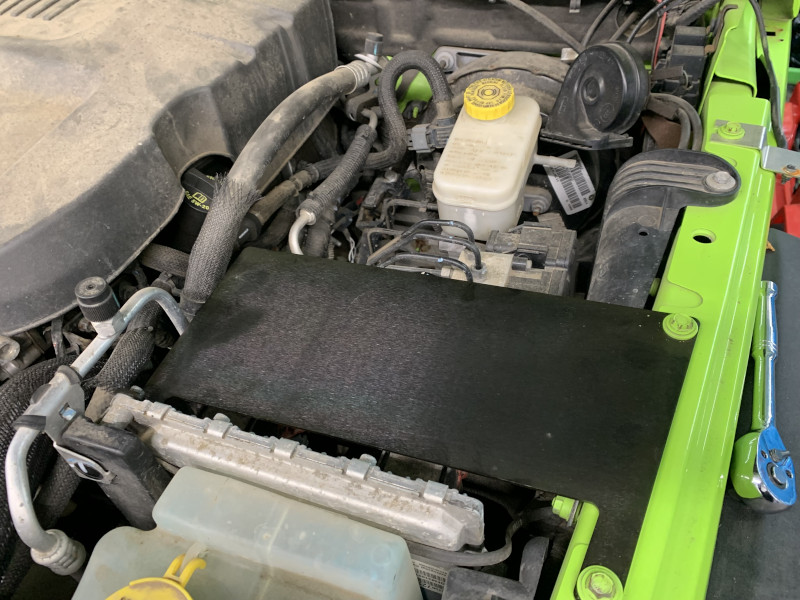
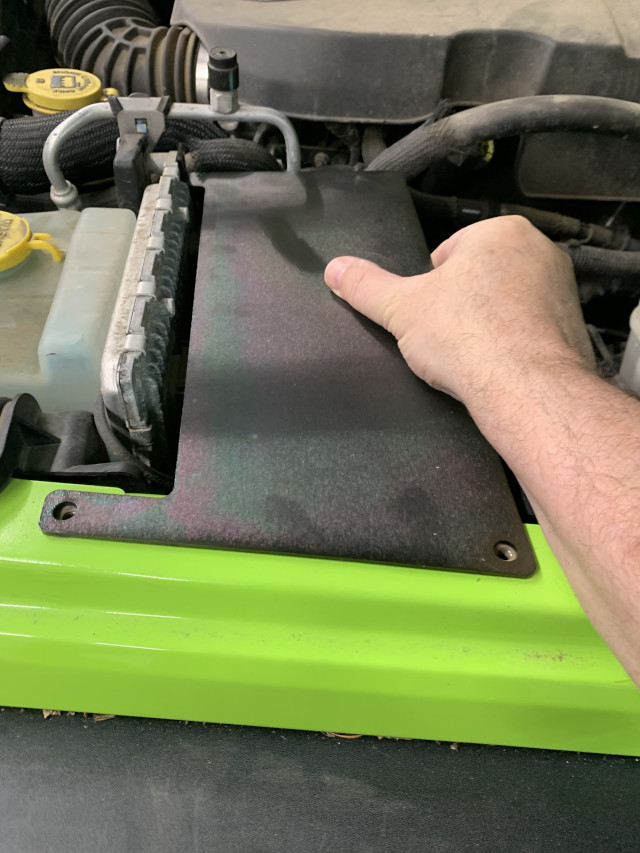
Put the place in its place
Now put the place in it’s location.
The tab on the plate where it connects to the computer should be pointed upward. I’m not sure how it could go otherwise, but just in case there was a question about it.
Loosely put the computer bolt back in through the plate, through the ground wire connection and into the computer bracket.
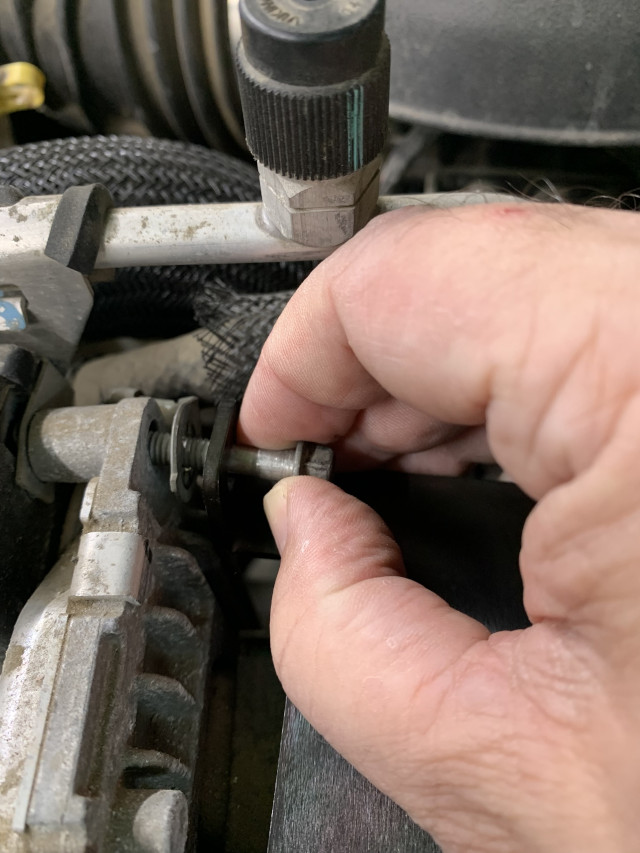
Fender Bolts
Now insert the fender bolts and loosely snug them down.
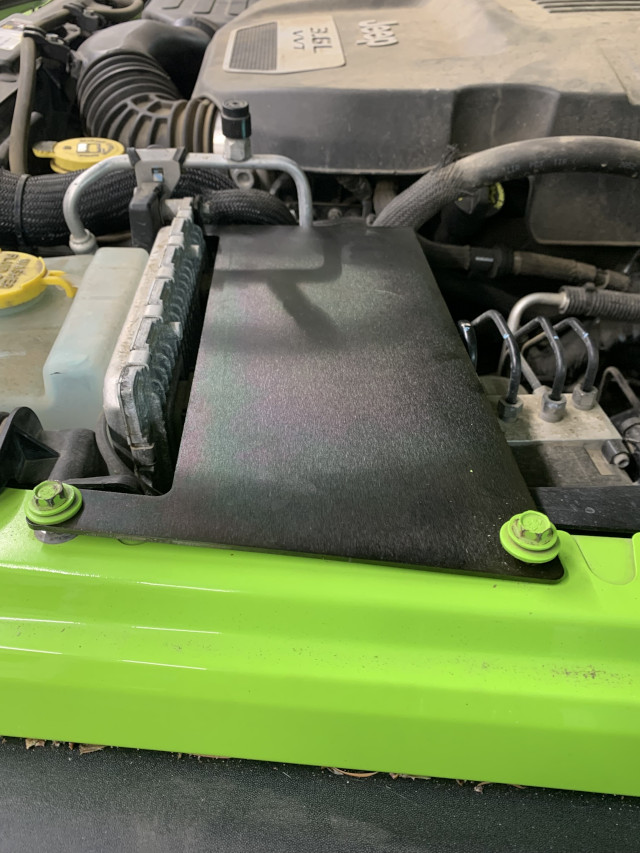
Tighten the bolt at the computer end then finish tightening the bolts on the fender.
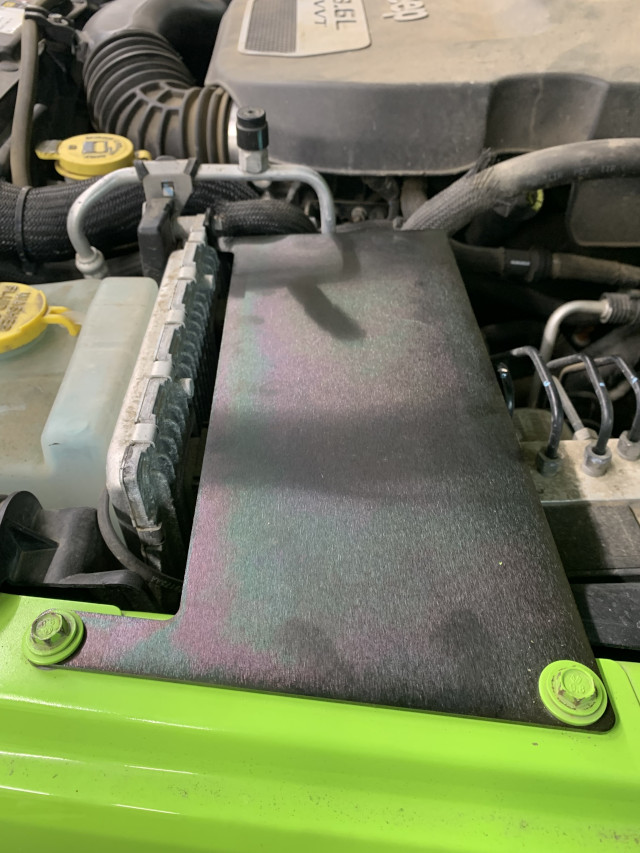
The accessory plate is now installed.
When you install something on here, I personally recommend you remove it first, fit and drill any holes needed to install your accessory, then re-install. This will prevent accidentally drilling into anything important in the engine bay, like your brake lines or computer wires.
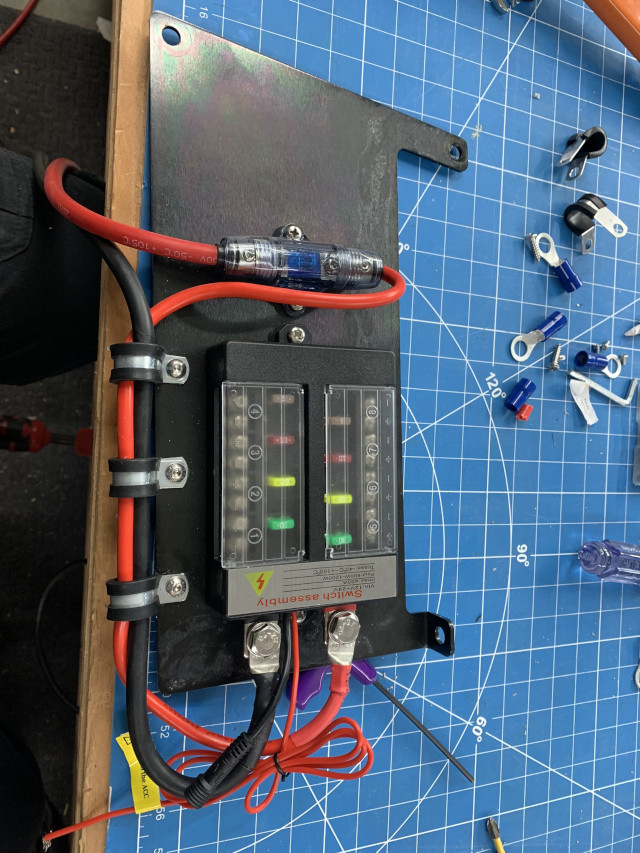
Example
Here is an example of how we used it. My wife likes lights on her Jeep. Two sets so far with plans to add more. She already has lockers, so why not.
We installed an AuxBeam 8 Gang switch, the fuse holder, and rubber lined wire clamps to keep everything tidy.
On the bench, holes were drilled in the accessory plate and all items attached. Then the whole unit was installed.
As you can see, it makes for a very tidy installation and clean mounting point that can be used for anything that fits the space.