How to install the Bad Gecko Off Road A-Pillar Bracket.
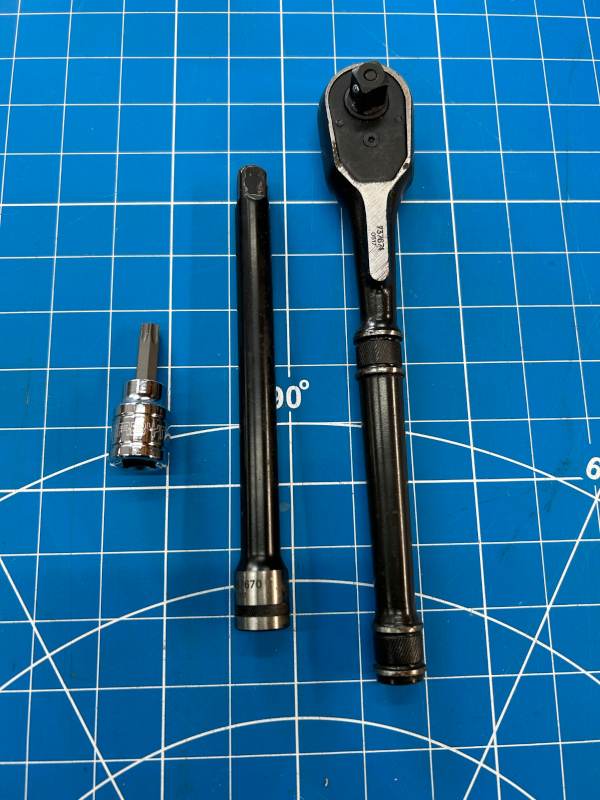
Tools
- Torx T-40 bit
- Ratchet to drive T-40 bit
- Extension – Not required but will make installation a bit easier.
NOTE: I recommend using hand tools not power tools. The nuts attaching the bolts inside the A-Pillar are held in place by a cage that can easily be overcome by a power tool. This opens up a whole set of complications for you to overcome if this happens.
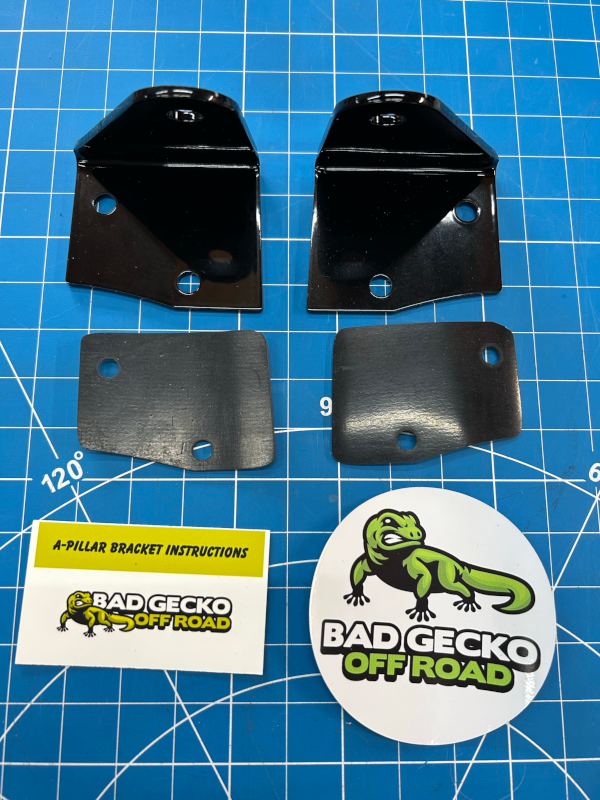
Contents
- A-Pillar Bracket Powder Coated Gloss Black. Right
- A-Pillar Bracket Powder Coated Gloss Black. Left
- 2x A-Pillar Bracket Gasket
- Card with QR Code and Link to instructions (this page).
- Sticker
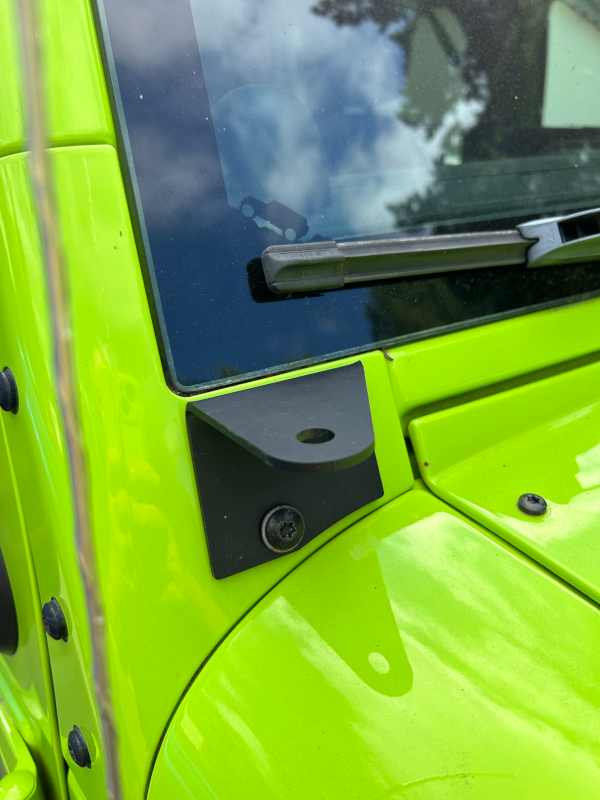
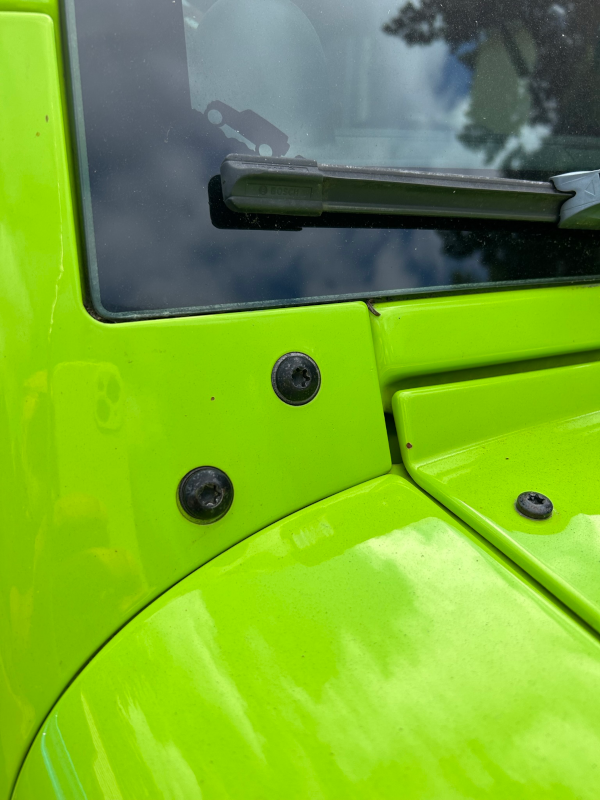
Locate the two front A-Pillar torx bolts.
There are a total of 6 Torx bolts holding the windshield frame in place. We are looking for the two on the same face as the windshield.
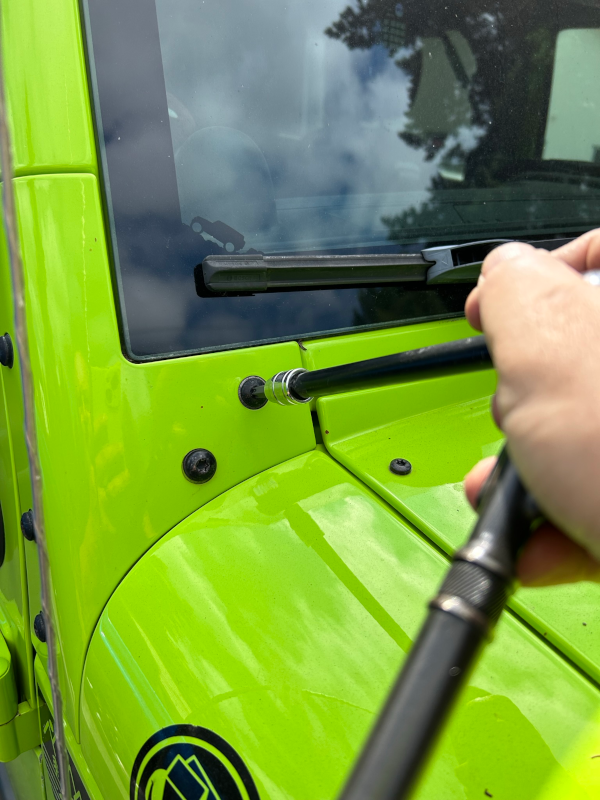
Remove the two front A-Pillar torx bolts.
Using the t-40 torx bit, remove the the two front A-Pillar bolts from the front of the windshield frame. Keep them close by because we will reuse them.
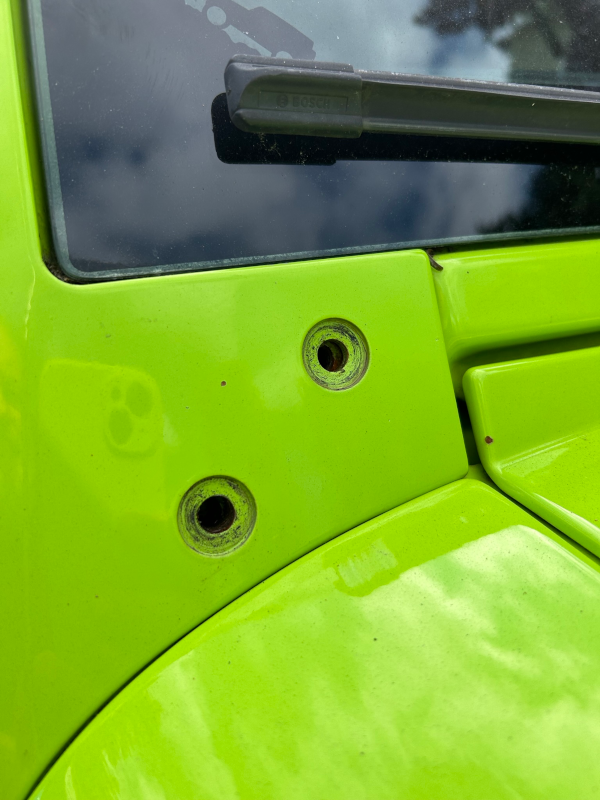
Clean off any dust, dirt, bugs, rust, grease, or any other contaminants to prevent damaging your paint.
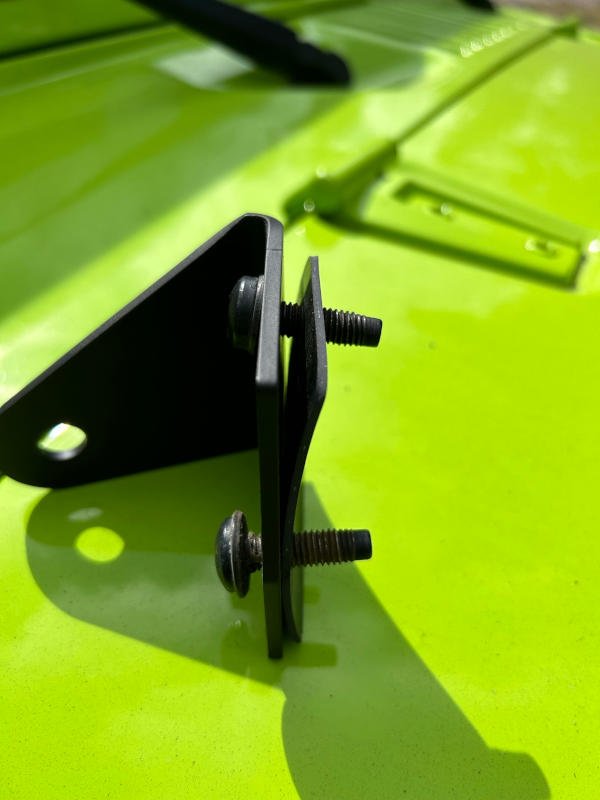
Put the bracket, gasket, and bolts together.
Locate the bracket for the side of the Jeep you are working on using the holes to help determine which one you have.
Put the torx bolts through the bracket, the put the gasket on as well. This helps hold the gasket while re-installing the bracket.
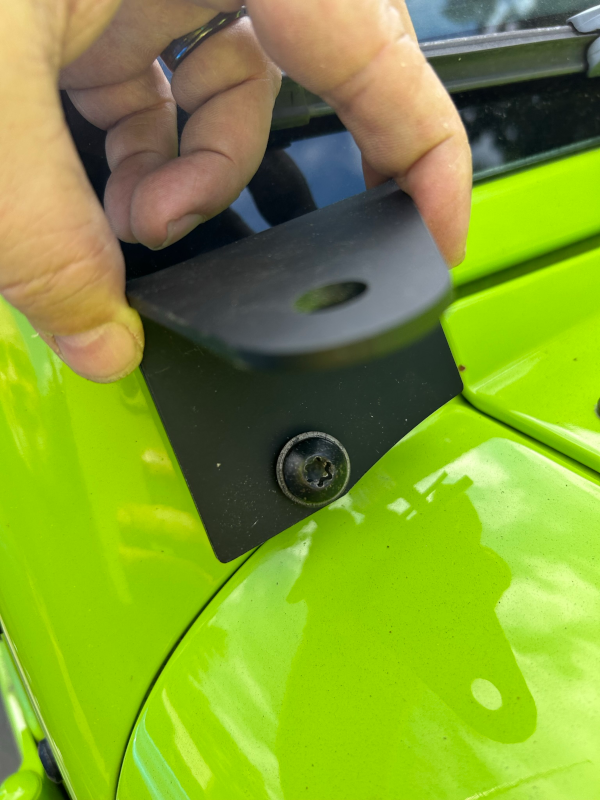
Install the brackets.
Line the bolts up with the bolt holes on the A-Pillar.
Tighten the bolts.
WARNING: Do not overtighten the bolts. The nuts on the back side of the windshield frame are held in place by a sheetmetal cage that is easily overcome if too much torque is applied. That will quickly escalate this simple install into a more involved and complicated fix. This is also why I do not recommend using power tools to do this.
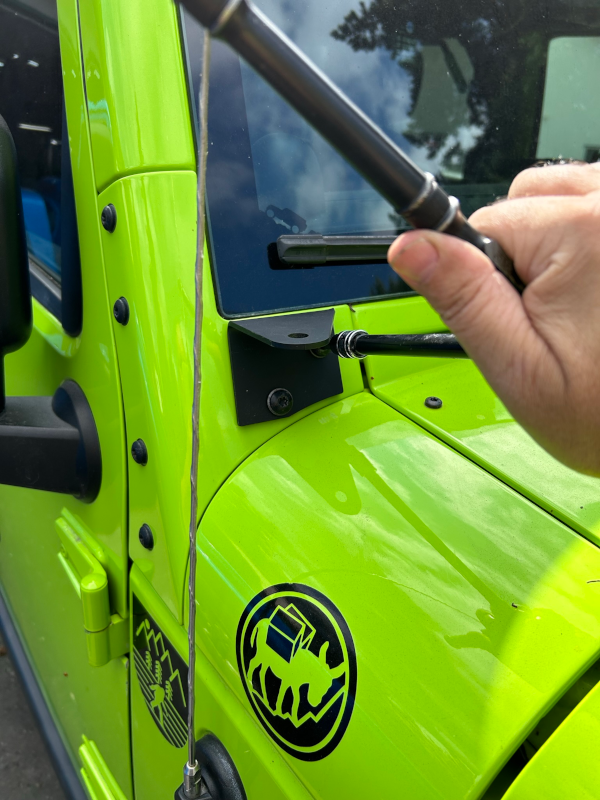
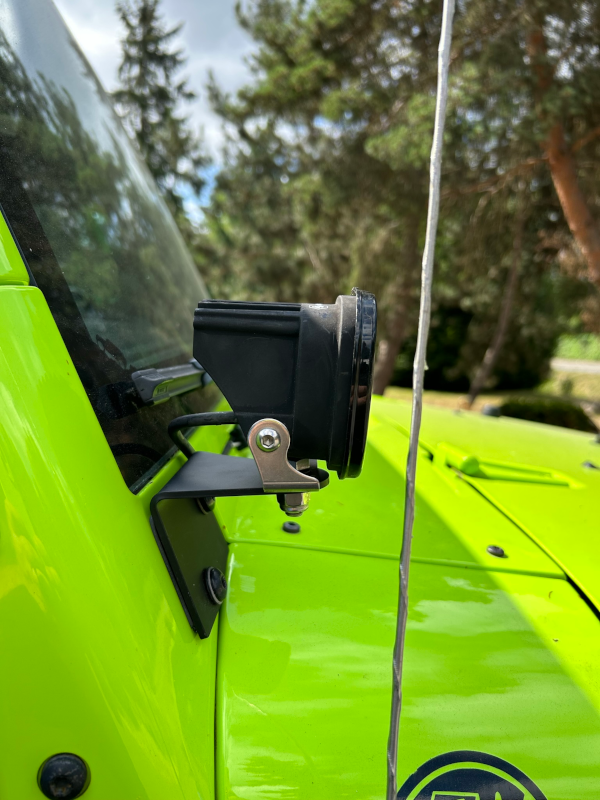
Congratulations! You are ready for lights!
Congratulations! You have installed your A-Pillar brackets!
All that you need to do now is install your lights as per the light manufacturer’s instructions.